Pasta From Scratch: A Step-by-Step Guide to Handmade Noodles
-
 Jackie Maple
- 7 Min To Read
- 4/1/2024
Ingredients You'll Need
Making your own pasta from scratch might seem like a daunting task, but with a few simple ingredients and a bit of patience, you'll be able to create delicious, homemade noodles that far surpass anything you can buy in a store. Here's what you'll need to get started on your pasta-making journey:
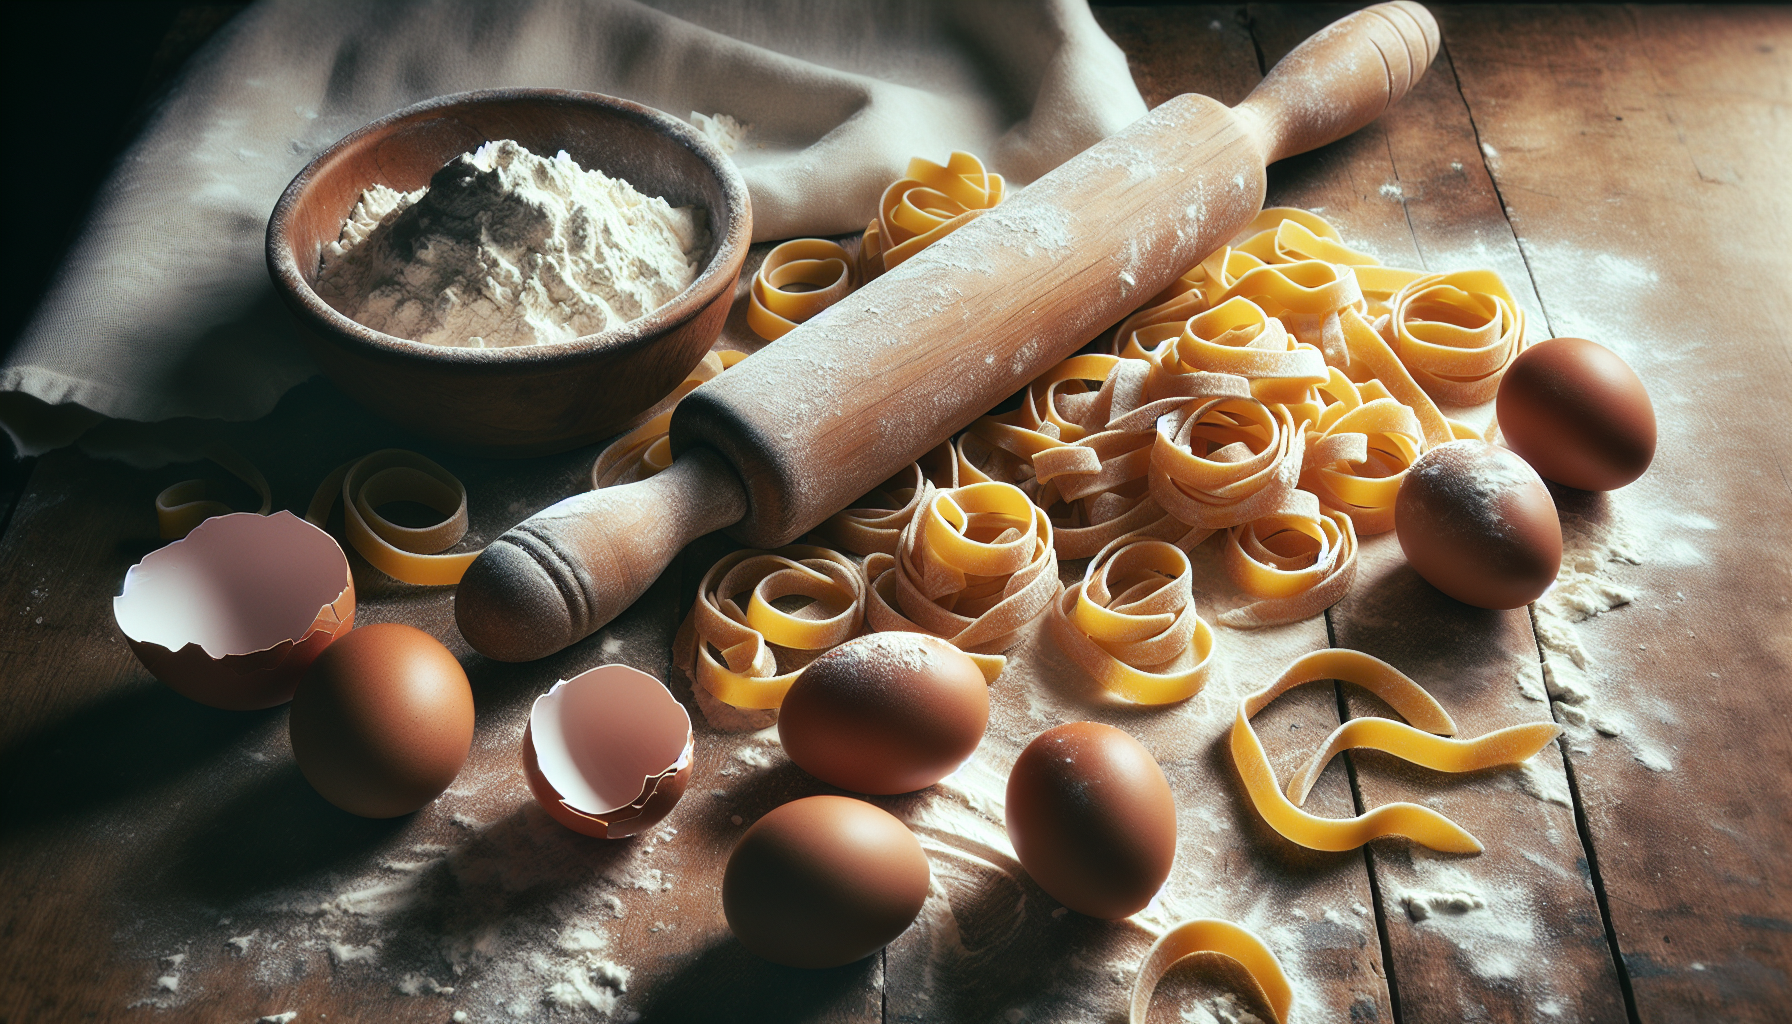
- 2 cups of all-purpose flour - This will be the base of your pasta dough. It's important to have a little extra flour on hand for dusting your work surface and your dough, as this will prevent sticking and make the rolling process much smoother.
- 3 large eggs - Eggs are crucial for adding richness and color to your pasta. They also play a vital role in binding the dough together. Make sure your eggs are at room temperature before you start, as this will make them easier to incorporate into the flour.
- A pinch of salt - Salt is a simple but essential ingredient. It enhances the flavor of the pasta, ensuring that your homemade noodles are anything but bland. Just a pinch will do, as you can always adjust the seasoning of your pasta dish later on.
With just these three ingredients, you're well on your way to creating a beautiful batch of homemade pasta. Remember, the quality of your ingredients can greatly affect the outcome of your pasta, so opt for the freshest eggs and the best flour you can find. Happy cooking!
Tools You'll Need
A flat surface for kneading, A rolling pin or pasta machine, A sharp knife or pasta cutter.Step 1: Preparing the Dough
Begin by sifting your flour onto a clean, flat surface, creating a mound. Make a well in the center large enough to hold your eggs. Crack the eggs into the well and add a pinch of salt. Using a fork, gently beat the eggs, gradually incorporating the flour from the sides of the well. As the mixture thickens, begin kneading with your hands. Knead the dough for about 10 minutes, or until it's smooth and elastic. If the dough is too sticky, add a little more flour; if it's too dry, add a few drops of water. Once kneaded, wrap the dough in plastic wrap and let it rest for at least 30 minutes. This resting period allows the gluten in the dough to relax, making it easier to roll out.Step 2: Rolling Out the Dough
Once your dough has had time to rest, it's essential to keep it from drying out. Start by dividing the dough into four equal parts. This makes the rolling process more manageable and ensures that your pasta is uniformly thin. To prevent the unused portions from drying, cover them with a clean kitchen towel or plastic wrap. This simple step helps maintain the dough's moisture and pliability.
Take one of the divided dough pieces and press it down with the palm of your hand on a clean, lightly floured surface. This initial flattening makes it easier to roll out the dough to the desired thinness. If you have a pasta machine, you can certainly use it at this stage to roll out your dough. However, if you're sticking to the traditional method, a rolling pin will do just fine.
Begin rolling out the dough, applying even pressure with the rolling pin. Start from the center and work your way outwards in all directions. This technique helps in achieving a uniformly thin sheet of pasta. It's crucial to keep the surface and the rolling pin lightly floured during this process to prevent the dough from sticking. If the dough sticks, it can tear, which would require you to start over with that piece.
The goal is to roll the dough until it's incredibly thin—ideally, thin enough that you can see the outline of your hand through it when held up against a light source. This level of thinness is key for delicate, delicious homemade pasta. It might take some time and patience to get there, but the effort is well worth it. The thin, almost translucent dough ensures that your pasta cooks evenly and integrates perfectly with your chosen sauces and ingredients.
Remember, the art of rolling out pasta dough is something that gets easier with practice. Don't be discouraged if your first few attempts aren't perfect. Each time you roll out a piece of dough, you're one step closer to mastering homemade pasta.
Step 3: Cutting the Pasta
Once your dough has reached the perfect thickness, the exciting moment of transforming it into delicious pasta shapes arrives. Cutting your pasta is a process that blends tradition with personal touch. If your aim is to create long, slender noodles such as fettuccine or linguine, a sharp knife or a specialized pasta cutter will be your tools of choice. Lay your rolled dough flat on a clean surface, and with a steady hand, slice through the dough to create strips of your preferred width. The key here is consistency; try to keep your noodles uniform in size to ensure even cooking.
For those who are venturing into the delightful world of shaped pasta like farfalle, ravioli, or even creative shapes that defy traditional names, a sharp knife is your canvas and your imagination the limit. To make farfalle, for example, start by cutting the dough into small rectangles. Then, pinch each rectangle in the center to form the classic bow-tie shape. For ravioli, place a small dollop of your filling of choice in the center of a dough square, top with another square, and press the edges to seal, ensuring no air pockets remain.
After cutting, you're faced with a choice: to cook your pasta immediately or to let it dry. Cooking it right away offers the unparalleled joy of tasting your creation at its freshest. Simply bring a large pot of salted water to a boil, add your pasta, and cook until it floats to the surface, indicating it's ready to be drained and enjoyed. Alternatively, if you're planning a pasta feast in the future, drying your pasta is a great option. Arrange the cut pasta in a single layer on a drying rack, ensuring none of the pieces are touching, and allow it to air dry until it's completely devoid of moisture. This can take anywhere from a few hours to overnight, depending on the thickness of your pasta. Once dry, store it in an airtight container until you're ready to bring your culinary creation to life.
Step 4: Cooking Your Pasta
To embark on the final journey of transforming your handmade pasta into a delightful dish, you'll need to master the art of cooking it to perfection. The process begins with a fundamental step: bringing a large pot of water to a vigorous boil. This is no ordinary water, though. To mimic the seas, generously salt the water, enhancing the pasta's intrinsic flavors and ensuring it's anything but bland.
With the water bubbling away, it's time to introduce your pasta to its hot bath. Gently add your pasta into the pot, taking care not to splash. Once in, give it a gentle stir with a wooden spoon or a pair of tongs. This is crucial as it prevents the noodles from clumping together or sticking to the bottom of the pot, ensuring each strand or piece cooks evenly.
One of the magical aspects of fresh pasta is its quick cooking time. Unlike its dried counterpart, which can take upwards of 10 minutes, fresh pasta will be ready in a mere 1 to 3 minutes. However, the exact timing can vary based on the thickness and shape of your pasta, so stay vigilant. The best way to judge if your pasta is perfectly cooked is to taste it. Fish out a piece, let it cool for a moment, and then taste it. You're looking for a texture that's tender, yet firm to the bite, known in Italian as 'al dente'.
Once your pasta has reached this culinary sweet spot, it's time to drain it. Do so carefully, as the water will be extremely hot. For an extra touch of elegance, consider reserving a cup of the pasta water. This starchy liquid is a chef's secret weapon, perfect for adjusting the consistency of your sauce, helping it to cling to the noodles beautifully.
Finally, the moment of truth arrives. Transfer your drained pasta back into the pot or into a serving dish and lavish it with your chosen sauce. Whether you've prepared a rich tomato sauce, a creamy Alfredo, or a simple garlic and olive oil concoction, the sauce will embrace each strand or piece, bringing your culinary creation to life. Serve immediately, and bask in the glory of your handmade pasta, a true labor of love.
Conclusion
Making pasta from scratch is a rewarding process that enhances any dish with the unmistakable flavor and texture of homemade noodles. With practice, you'll find that the possibilities for customization are endless, allowing you to tailor your pasta to the seasons, your health, and your taste preferences. So, roll up your sleeves and dive into the delightful world of handmade pasta.